To replace a washing machine belt, first, unplug the machine and remove the back panel. Then, loosen the belt tension and slide the old belt off before putting the new one on and tightening the tension.
A malfunctioning washing machine can disrupt your entire household routine, but sometimes, the fix can be simpler than you think. In this guide, we’ll walk you through the process of replacing a washing machine belt. This essential component ensures that your washer’s drum rotates correctly, and with just a few tools and some patience, you can save yourself the cost and hassle of a repair technician. Let’s get started on getting your washing machine back in working order.

Credit: m.youtube.com
Understanding the Washing Machine Belt
Before diving into the replacement process, it’s essential to understand what the washing machine belt does. This belt connects the motor to the drum, enabling it to spin during wash and spin cycles. Over time, the belt can wear out, stretch, or break, leading to issues like the drum not spinning or the machine making strange noises. Recognizing the signs of a faulty belt, such as a washer that doesn’t agitate or spin, can help you diagnose the problem early and take corrective action.
Signs Of A Faulty Belt
One of the most apparent signs of a faulty washing machine belt is a loud squealing or banging noise during the spin cycle. Inconsistent spinning or agitation and a burnt rubber smell during operation also indicate a potential issue with the belt.
Moreover, if you notice the drum not turning or the washer not draining properly, these are additional signs of a worn-out or damaged belt.
Benefits Of Timely Replacement
Timely replacement of the washing machine belt can prevent further damage to the appliance. Regular maintenance ensures the smooth functioning of the washer and helps in avoiding costly repairs in the long run.
By replacing the belt promptly, you can maintain the efficiency of the washing machine, resulting in cleaner clothes and reduced energy consumption.
Tools And Materials Needed
To ensure a smooth replacement process, gather all necessary tools and materials beforehand. You’ll need a screwdriver, a wrench, and pliers. Depending on your washing machine model, you might also require a socket set. Additionally, having a new belt ready is crucial. For example, if you have a Whirlpool WTW5000DW, the Whirlpool 661570V replacement belt is a perfect fit. Don’t forget to have some safety gear like gloves and safety glasses to protect yourself during the repair.
List Of Essential Tools
Before you begin the belt replacement process, make sure you have the following tools readily available:
-
Screwdriver set
-
Adjustable wrench
-
Putty knife
-
Bucket or container for water drainage
-
Work gloves
-
Safety goggles
Selecting The Right Belt
Choosing the correct replacement belt for your washing machine is crucial. Refer to the appliance’s manual or the manufacturer’s website to identify the specific belt model required for your machine. Consider the size, type, and compatibility of the belt to ensure a proper fit and functionality.
Preparing The Work Area
To replace a washing machine belt, it is crucial to prepare the work area properly. Clear out any obstacles, unplug the machine, and ensure you have the necessary tools before beginning the process. By following these steps, you can effectively replace the belt without any hassle.
Safety Precautions
Before starting the process of replacing a washing machine belt, it is crucial to prioritize safety precautions. Following these steps will help ensure your safety throughout the process:
- Unplug the washing machine from the power source to prevent any electrical accidents.
- Wear protective gloves to protect your hands from any sharp edges or moving parts.
- Clear the work area of any obstacles or clutter to create a safe and accessible space.
- Keep a fire extinguisher nearby as a precautionary measure.
Positioning The Washing Machine
Properly positioning the washing machine is essential to facilitate the belt replacement process. Follow these steps to ensure the washing machine is in the ideal position:
- Move the washing machine to a well-lit area with enough space to work comfortably.
- Place the washing machine on a stable and level surface to prevent any accidents or imbalance.
- Ensure the water supply and drain hoses are easily accessible for the replacement process.
- Securely lock the wheels or stabilizers of the washing machine to prevent any movement during the repair.
By adhering to these safety precautions and properly positioning the washing machine, you will create a safe and convenient work area for replacing the washing machine belt. Remember to always prioritize your safety and take necessary precautions to avoid any accidents or injuries.
Credit: authorizedco.com
Step-by-Step Guide to Replacing the Washing Machine Belt
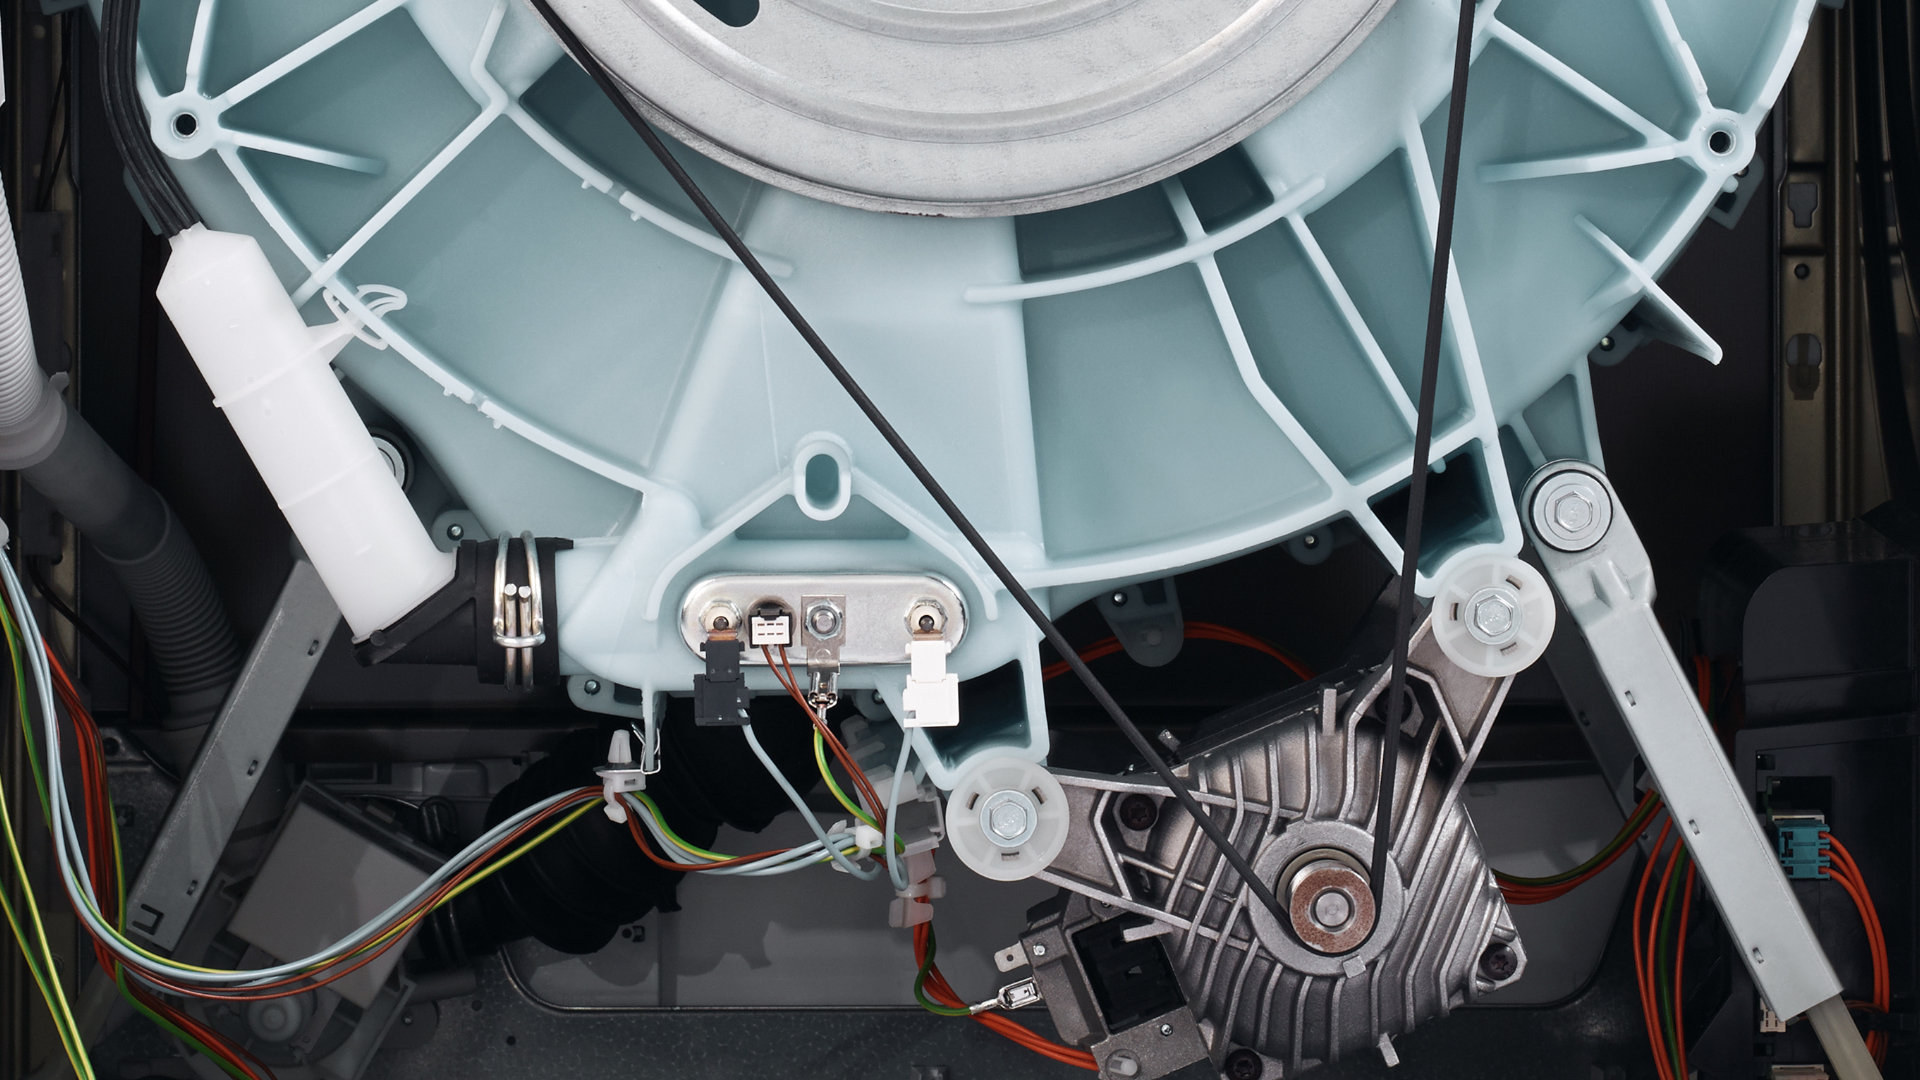
Step 1: Accessing the Belt
The first step in replacing your washing machine belt is to gain access to the belt itself. Begin by removing the back panel or cabinet of your washer. This typically involves unscrewing several screws around the perimeter of the panel. Once removed, you’ll have a clear view of the internal components, including the belt. Make sure to keep the screws in a safe place, as you’ll need them for reassembly.
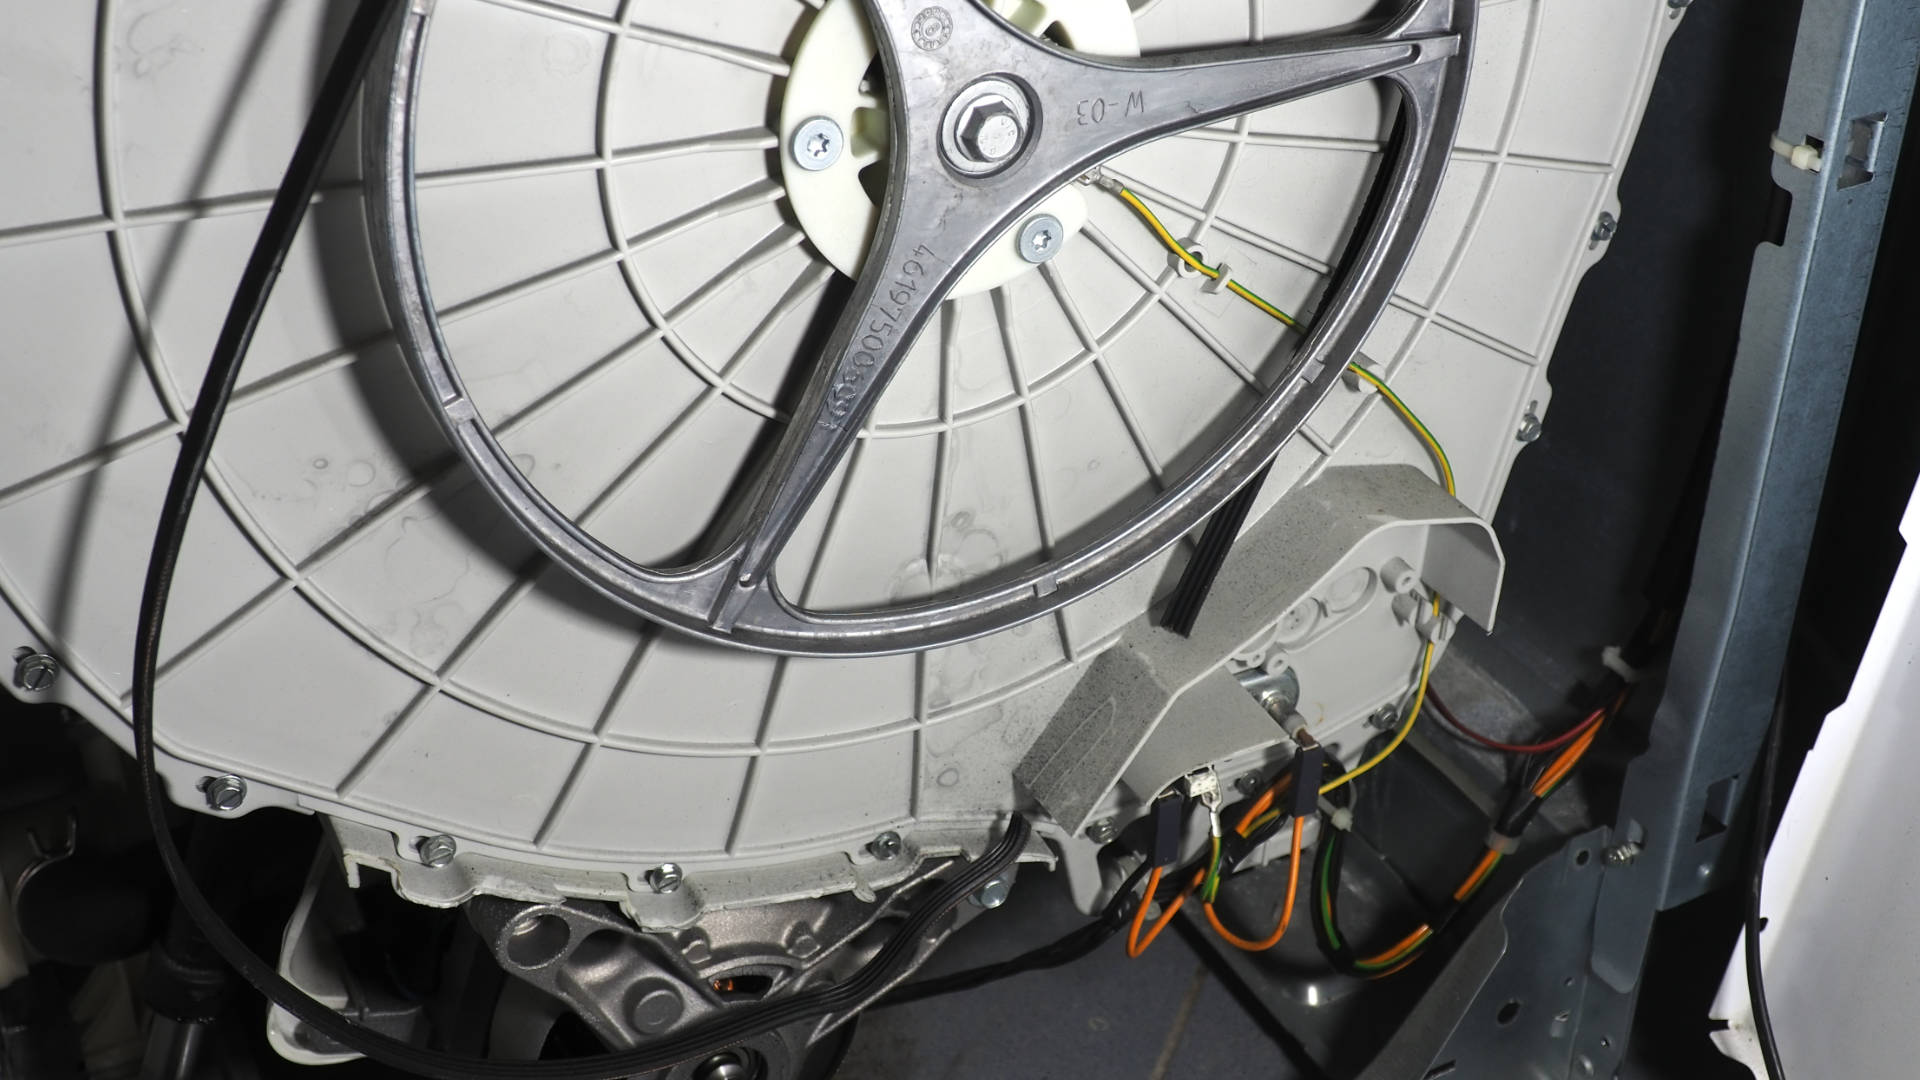
Step 2: Removing the Old Belt
With the belt now visible, the next step is to carefully remove the old, worn-out belt. Depending on your washing machine model, you may need to loosen the tensioner. This component keeps the belt tight around the pulleys. Use your wrench to adjust the tensioner and slide the old belt off the motor and drum pulleys. Be gentle to avoid damaging other parts of the machine.
Step 3: Comparing the Old and New Belts
Before installing the new belt, it’s crucial to compare it with the old one to ensure a proper fit. Check the length, width, and pattern of the new belt against the old one. This step ensures that you have the correct replacement. For instance, if you’re replacing the belt on an LG front-load washer, make sure the new belt matches the specifications of the old one to avoid any compatibility issues.
Step 4: Installing the New Belt
Now it’s time to install the new belt, which requires some patience and precision. Place the new belt around the motor pulley first, then around the drum pulley. Ensure the belt is properly seated and aligned on both pulleys. This step might be a bit tricky, as the new belt will be tighter than the old one. Take your time and make sure it’s aligned correctly to avoid any future problems.
Step 5: Adjusting the Tension
Proper belt tension is key to the smooth operation of your washing machine. If your washer has a tensioner, adjust it to ensure the new belt is tight but not overly stretched. You should be able to press down on the belt slightly without it feeling loose. Testing the belt’s tension and making necessary adjustments will prevent it from slipping off during operation.
Step 6: Reassembling the Washing Machine
With the new belt in place, the final step is to reassemble your washing machine. Carefully reattach the back panel or cabinet, ensuring all screws and fasteners are secured tightly. This step is crucial to prevent any parts from coming loose during operation. Double-check that everything is in place and properly secured before moving on to testing the machine.
Testing The New Installation
After replacing the washing machine belt, testing the new installation is crucial to ensure proper functioning. Run a short cycle to check for any unusual sounds or movements. Additionally, inspect the belt for any signs of wear and tear to guarantee smooth operation.
Testing the New Installation: Now that you have successfully replaced the washing machine belt, it’s time to test your installation to ensure everything is working properly. By following these simple steps, you can verify that the new belt is functioning correctly and your washing machine is ready to tackle the next load of laundry.
Initial Checks Before Powering On
Before turning on the power, it’s essential to perform a few initial checks to ensure the safety and functionality of your washing machine. These checks include:
1. Visual Inspection: Examine the belt to ensure it is properly aligned and securely fitted around the motor and pulley. Look for any signs of damage or wear that may affect its performance.
2. Belt Tension: Check the tension of the belt by gently pressing on it. It should have a slight give but not be too loose. Adjust the tension if necessary to ensure proper operation.
3. Connections: Double-check all electrical connections and make sure they are secure and properly plugged in. Loose connections can lead to electrical issues or the washing machine not working at all.
Running A Test Cycle
Once you have completed the initial checks, it’s time to run a test cycle to confirm that the new belt is functioning correctly. Follow these steps to perform the test:
1. Load: Place a small load of laundry into the washing machine. Ensure it is evenly distributed to prevent unbalanced loads during the test cycle.
2. Settings: Select the desired settings for your test cycle, such as water temperature, wash cycle, and spin speed. Make sure to choose a setting that will thoroughly test the belt’s performance.
3. Power On: Turn on the power to the washing machine and allow it to begin the test cycle. Observe the machine closely to ensure the belt is rotating smoothly and without any unusual noises or vibrations.
4. Monitor: Throughout the test cycle, monitor the washing machine’s performance. Pay attention to any irregularities, such as excessive noise, shaking, or the belt slipping off. If any issues arise, stop the test cycle and address the problem before continuing.
5. Completion: Once the test cycle is complete and the washing machine has finished its operation, inspect the belt again. Ensure it has maintained its proper alignment and tension during the test.
By following these steps and conducting a thorough test, you can confidently ensure that the new washing machine belt is installed correctly and functioning as intended. Enjoy the peace of mind knowing that your washing machine is ready to handle your laundry needs efficiently and effectively.
Maintenance Tips For Longevity
To extend the life of your new washing machine belt, regular maintenance is key. Periodically check the belt for signs of wear and tear, such as fraying or cracking. Keeping the drum and motor pulleys clean can also prevent premature belt wear. Additionally, avoid overloading your washing machine, as this can put extra strain on the belt and other components.
Real Product Example
When I replaced the belt on my Whirlpool washing machine, I found the process straightforward thanks to the clear instructions provided. I used the Whirlpool 661570V belt, which was a perfect fit for my model. The most challenging part was ensuring the belt was properly tensioned, but with a bit of patience, I managed to get it right. The washer now runs smoothly and quietly, and I’ve saved a considerable amount on repair costs.
Troubleshooting Common Issues
After replacing the washing machine belt, it’s essential to troubleshoot common issues that may arise. Understanding how to address these problems can help ensure that your washing machine operates smoothly.
Dealing With Noise After Replacement
If your washing machine is making unusual noises after replacing the belt, it’s crucial to investigate the source of the sound. Start by checking if the belt is properly aligned and tensioned. Ensure that the pulleys are not damaged and are rotating smoothly. Inspect the motor and ensure it is functioning without any irregularities.
What To Do If The Belt Slips Off
If the belt slips off after replacement, there may be an issue with tension or alignment. Carefully examine the belt to see if it has worn out or stretched. Additionally, check the pulleys for any signs of damage. Ensure that the belt is correctly positioned and properly tensioned to prevent slippage during operation.
Credit: fleetappliance.com
Frequently Asked Questions
Is A Washing Machine Belt Easy To Replace?
Yes, a washing machine belt is easy to replace. You can follow the user manual or online tutorials for guidance.
How Much Does It Cost To Replace A Belt On A Washing Machine?
The cost to replace a belt on a washing machine can range from $100 to $200. Prices vary based on the brand and model. It’s best to consult a professional for an accurate estimate. Regular maintenance can help prevent costly repairs.
How Do I Know If My Washing Machine Belt Is Bad?
To determine if your washing machine belt is bad, look for signs such as a burning smell, excessive noise during operation, or the drum not spinning. Inspect the belt for cracks, fraying, or looseness. If any of these issues are present, it’s likely that your washing machine belt needs to be replaced.
How To Change Belt In Washing Machine?
To change the belt in a washing machine: 1. Unplug the machine and locate the access panel at the back. 2. Remove the screws and take off the panel. 3. Locate the old belt and release tension by moving the motor or pulley.
4. Slip off the old belt and put on the new one. 5. Reassemble the access panel and plug in the machine. Done!